Additional Charges
Main Page / Admin / Additional Charges
- Additional charges are configured to be added only when another charge triggers them
- Firstly, add a Product that will act as the Additional Charge, ensuring the Product Type of the Product is set to Additional Charge. That can be done Here
- Then back in the Additional Charges screen click + Add in the top right

- The Add Charge screen will pop up
- The Qualification section is to configure what will trigger the additional charge
- Select which Product will be the initial trigger e.g. Landing
- Then from the other field options refine the specifics of the trigger, ranging from Charge Groups to the Quantity or select a specific customer
- In the Validity section add a From Date and To Date or leave blank for the Additional Charge to always be applied
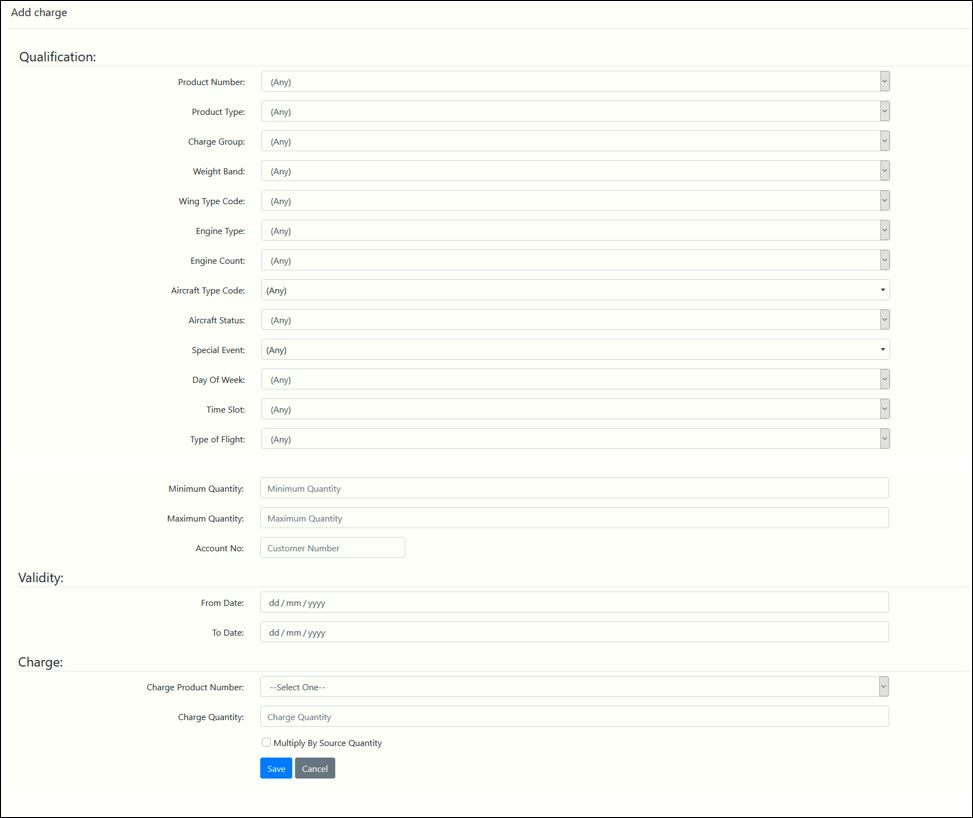
- Finally, in the Charge section add the Additional Charge Product from the drop-down option
- Add the Charge Quantity with a minimum of 1, then if there should be a multiplier based on the Quantity of the trigger tick the Multiply By Source Quantity
- Click Save and the Additional Charge will be created
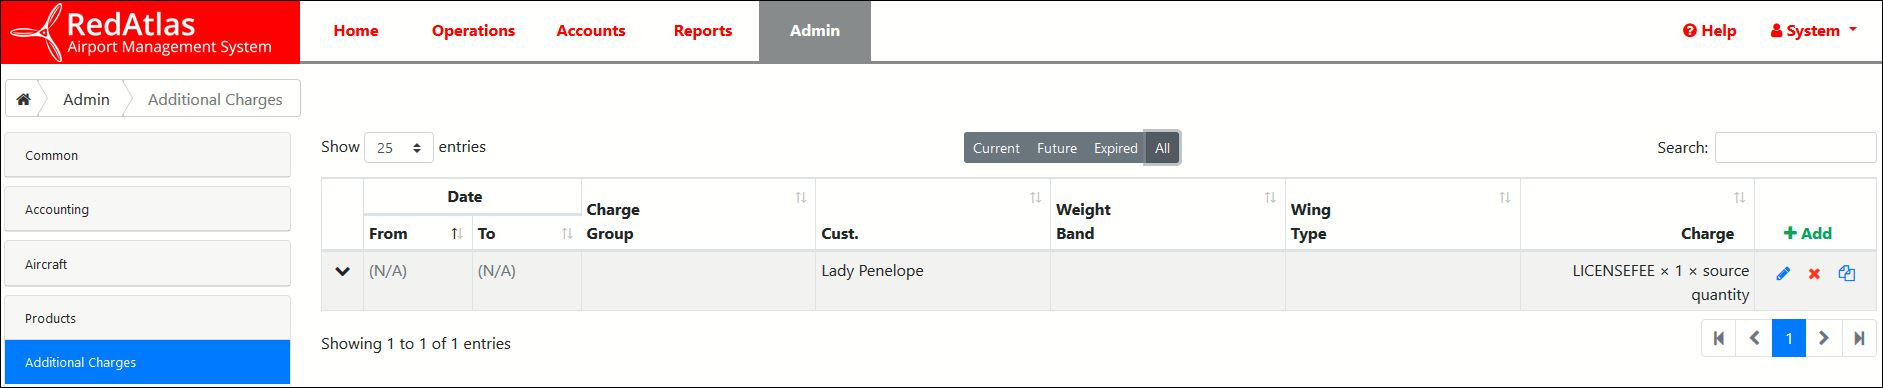
- In the Additional Charges screen you can view more information about charges that are already set up by click V on the left of the row

- You can all Edit a charge by clicking the pencil icon, delete it by clicking the x or duplicate, for ease of creating multiple charges, by click the copy paper icon
Main Page / Admin / Additional Charges